Monday, October 29, 2012

Creamy Peanut Butter Squares


One of my old, favorite recipes.


Reading about the last time I made these, I forgot I like to use natural chunky peanut butter for these! I used creamy JIF this time.


I love when you get alittle piece of graham cracker that wasn't fully crushed. Yummy. You can recreate that by just using chunky peanut butter. 


You may want to sift the powdered sugar if you are making these for guests. I normally don't, but then you might see little clumps of sugar. Still tastes good, but your guests might be like, "what the heck is that!"


I've made variations to these over the years. Natural peanut butter or JIF, chunky or smooth peanut butter, one cup less powdered sugar, or one cup less graham cracker crumbs, dark, bittersweet or semi-sweet chocolate chips : it doesn't matter. It all tastes good.


You can put these in the freezer for 30 minutes after making so they are ready sooner. Otherwise, keep in the refrigerator.


Also, you can melt the peanut butter and butter in the 8x8 glass dish and save a clean bowl.


Peanut Butter Squares

1/2 cup butter
1 cup creamy peanut butter 
1 cup graham cracker crumbs
1 cup sifted powdered sugar
1 cup semisweet chocolate chips
1 teaspoon shortening

Place butter and peanut butter in a 2-quart glass bowl. Cover with a paper towel, and microwave at HIGH 1 ½ minutes. Stir in graham cracker crumbs and powdered sugar.

Press into an 11 x 7 x 1 ½ inch OR an 8 x 8 inch baking dish.

Place chocolate and shortening in a 1-cup or 2-cup glass measuring cup. Microwave at medium (50% power) for 2 minutes. Stir well- the chocolate will melt. Spread over peanut butter mixture. Cover and chill until firm, about 45-60 minutes. Let stand at room temperature 10 minutes before serving.


Wednesday, October 17, 2012

Pumpkin Whoopie Pies


A year ago, I thought I made these look really good. Looking back at it, I hope these look better. Hoping to see I can improve, even when I'm in a big hurry to get back to work. 


I made these again this year for UTSA MSA's bake sale. I saw some pictures and a video of their Islam Awareness week, awesome job!


I got these cupcake liners from Michael's. I thought they were perfect for fall.


Last year I made them about a teaspoon size. This year, I accidentally made them a tablespoon size. I was wondering why I made less whoopie pies.  


Trick to making super soft whoopie pies: chill the batter at least 8 hours, and then bake them the night before. Store in a container with a lid, and the next day they come out very moist. 


I lightly dusted them with powdered sugar, but they were so moist that the sugar disappeared in a minute.


Cream cheese icing is the best filling for pumpkin whoopie pies. I'm off to buy some more pumpkin puree. I'm making these again for Naseem's this Friday. :)


Pumpkin Whoopie Pies
Adapted from Martha Stewart

Filling
4 cups confectioners' sugar
2/3 cup unsalted butter, softened
16 ounces cream cheese, softened
2 teaspoons pure vanilla extract
2 tablespoons whipping cream

Cookies
3 cups all-purpose flour
1 teaspoon salt
1 teaspoon baking powder
1 teaspoon baking soda
3 tablespoons ground cinnamon
1 teaspoon ground ginger
1 teaspoon ground cloves
2 cups firmly packed light brown sugar
1 cup vegetable oil
3 cups pumpkin puree, chilled (or allow batter to chill overnight)
2 large eggs
1 teaspoon pure vanilla extract


Preheat oven to 350 degrees. Line two baking sheets with parchment paper or a nonstick baking mat; set aside.

In a large bowl, whisk together flour, salt, baking powder, baking soda, cinnamon, ginger, and cloves; set aside. In another large bowl, whisk together brown sugar and oil until well combined. Add pumpkin puree and whisk until combined. Add eggs and vanilla and whisk until well combined. Sprinkle flour mixture over pumpkin mixture and whisk until fully incorporated.

Drop heaping tablespoons of dough onto prepared baking sheets, about 1 inch apart. Transfer to oven and bake until cookies are just starting to crack on top and a toothpick inserted into the center of each cookie comes out clean, about 15 minutes. Let cool completely on pan. If possible, allow cookies to rest overnight in a plastic container with a lid to become moist.

Make the filling: Sift confectioner' sugar into a medium bowl; set aside. In the bowl of an electric mixer fitted with the whisk attachment, beat butter until smooth. Add cream cheese and beat until well combined. Add confectioners' sugar and vanilla, beat just until smooth. Gradually beat in cream. (Filling can be made up to a day in advance. Cover and refrigerate; let stand at room temperature to soften before using.)

Assemble the whoopie pies: Line a baking sheet with parchment paper and set aside. Transfer filling to a disposable pastry bag and snip the end. When cookies have cooled completely, pipe a large dollop of filling on the flat side of half of the cookies. Sandwich with remaining cookies, pressing down slightly so that the filling spreads to the edge of the cookies.

Wednesday, October 3, 2012

Cheesecake Factory Banana Cream Cheesecake


Hah! I have nailed the Cheesecake Factory Banana Cream Cheesecake. It's just as creamy as their's and the flavor is perfectly balanced with both banana and cream.


I have tried to replicate it before, but I ended up with a denser cheesecake. Still very good, but different.


It mostly has to do with the ratio of cream cheese to sweetened condensed milk, but it also helps to use Wilton bake even strips, which prevents the outer edges from over baking. I forgot to buy golden oreos for the crust, so I made my own, which paired with the banana and cream flavors wonderfully. 

By the way, I am now an Aunt Nora as of today. My nephew was born at 12:01 AM and holding him was alot more fun than making this cheesecake. <3    


Cheesecake Factory Banana Cream Cheesecake

Crust
2 tablespoons sugar1/2 tsp vanilla extract
1/4 cup butter, softened
1/2 cup all purpose flour
1/8 tsp salt

Cheesecake
2 (8 oz.) packages cream cheese, softened
2 (14 oz.) cans sweetened condensed milk
3 eggs
3/4 cup mashed bananas (about 2 bananas, mashed in blender)
1/4 cup whipping cream
2 teaspoons vanilla extract

Preheat oven to 350 F.

In a bowl, cream together the sugar, vanilla, and butter, until smooth and fluffy. Working at a low speed, gradually beat in flour and salt until mixture is like a cookie. Press evenly into bottom of a springform pan and bake for 8-10 minutes. Cool.

Beat cream cheese in large bowl with electric mixer at medium speed until creamy. Gradually add sweetened condensed milk. Add eggs, one at a time, beating well after each addition. Beat in bananas, whipping cream, and vanilla. 

Wet the bake-even strips and wrap around springform pan; secure with a metal pin. Place pan on a cookie sheet and pour cream cheese mixture into prepared crust.  Bake 45-50  minutes, until cheesecake is set up in center. It will still jiggle in center but should not appear wet.

Wednesday, September 26, 2012

Pineapple Upside Down Cheesecake


I got pineapple upside down cheesecake a few weeks ago at the cheesecake factory (one of my favorites) and I really wanted to recreate it. I notice they use crushed pineapple so I did too, but I also added pineapple rings so the top looks pretty.


I wanted the cheesecake to be just as creamy as their's. In the center of the cheesecake, it was. But the outer edges (where it bakes more) were more dense. I think I need to buy these. But anyway, this cake is caramelized sugared pineapple heaven. 


So, I haven't nailed the Cheesecake Factory recipe quite yet. I think I need to use more sweetened condensed milk and less cream cheese. Also, I believe they use maraschino cherry juice in the cheesecake but I thought that would be a disaster so I skipped it. Not the time to experiment with cherry juice business.


It took 5 spatulas and 6 hands to transfer that soft buttery pineapple upside down cake on top of the cheesecake. Whew! It didn't fall apart.  


This was so good the next day, I wanted to make some more. I did not bake the cheesecake with a crust because I initially thought I was going to sandwich it between two layers of cake (just like the Cheesecake Factory does) but then decided to go the lazy route and just put one cake layer on top. So, if you want to bake your cheesecake with a crust, no problem! I must say though, it doesn't need it!


Pineapple Upside Down Cake
Adapted from Betty Crocker

1/4 cup butter or margarine
2/3 cup packed brown sugar
7 slices pineapple in juice (from 14-oz can), drained
1/3 cup crushed pineapple in juice, drained
7 maraschino cherries without stems
1 1/3 cups all-purpose flour
1 cup granulated sugar
1/3 cup shortening
1 1/2 teaspoons baking powder
1/2 teaspoon salt
3/4 cup whole milk
1 egg
1/2 teaspoon rum extract

Heat oven to 350°F. In a 8.5-inch or 9-inch round pan, melt butter in oven. Sprinkle brown sugar evenly over melted butter. Arrange pineapple slices over brown sugar. Place cherry in center of each pineapple slice. Sprinkle crushed pineapple to fill in all the gaps, including inside the center of the pineapple rings.

In medium bowl, beat remaining ingredients with electric mixer on low speed 30 seconds, scraping bowl constantly. Beat on high speed 3 minutes, scraping bowl occasionally. Pour batter over pineapple and cherries, you may have about 1/4 cup left over batter that does not fit into pan.

Bake 50 to 55 minutes or until toothpick inserted in center comes out clean. Immediately place heatproof serving plate upside down over pan; turn plate and pan over. Leave pan over cake a few minutes so brown sugar mixture can drizzle over cake; remove pan. Serve warm (would be wonderful with vanilla ice cream) or allow to cool to place on top of cheesecake. 

Cheesecake
Adapted from... me!

3 (8 oz.) packages cream cheese, softened
2 (14 oz.) cans sweetened condensed milk
3 large eggs
1/2 teaspoon rum extract

Heat oven to 350ºF.  

Beat cream cheese in large bowl until fluffy. Gradually beat in sweetened condensed milk until smooth. Add eggs, one at a time, and extract; mix well. Place an 8.5-inch or 9-inch springform pan on top of cookie sheet, incase a small amount of batter leaks. Pour batter into pan. Place in oven, with the pan still on top of cookie sheet.  

Bake 45-50 minutes or until center is set. The center should jiggle around but not look wet. Remove from oven. Cool 1 hour. Chill at least 4 hours. 

Finish by using 5 spatulas (and some friends) to help you lift pineapple upside down cake on top of cheesecake.

Thursday, September 6, 2012

Salted Caramel Chocolate Chip Cookie Bars


I made these last week when Yusif and Naven came over to barbeque with us. 
Wow, I can't believe it's almost been a year since I first made these in brownie form. 


I really like the sea salt in these, of course, because it's paired with caramel! 
Layered desserts are always my favorite to make.


I used softened butter instead of melting it.


Make the cookies and spread half onto the bottom of a buttered 9x9 dish. I used a bit more than 2 cups of chocolate chips. Extra chocolate chips is always a good thing when making regular cookies. But actually, don't do that with these bars. There is plenty of gooey-ness going on with the caramel that I actually over did it. Please stick to a 12 oz. bag of chocolate chips!


These were my favorite candies as a kid. The recipe says to use 10 ounces caramel candy squares, which has to be a typo. I used alittle under 2 ounces (50 candies). I would say to use 45 candies for a better cookie to caramel ratio.  


Melt with 3 tablespoons heavy cream and


spread on top of the cookie layer and then sprinkle with sea salt.


Add the top layer of cookie and again sprinkle with sea salt.


Look at all that caramel!


Bake until golden brown and allow to cool. Don't even try to cut into it right now! It will be a huge mess! Allow me to quote from the last time I made these (with brownies),  

"When they came out of the oven we thought they were still under baked because after cooling for 10 minutes, they were still gooey, so we put it back in the oven. When they came out again, they were still runny, and I couldn't cut a piece without it squishing all over the place. When they were completely cooled, we could see they were baked. It was just that gooey caramel and the chocolate chips that were hot and messy."


So this recipe needs to cool before you can handle and serve them. But luckily, you can put them in the fridge for 30 minutes to speed the process up and they come out just fine.


Salted Caramel Chocolate Chip Cookie Bars
Adapted from: Brown Eyed Baker

Ingredients
2 1/8 cups all-purpose flour
½ teaspoon baking soda
½ teaspoon salt
12 tablespoons unsalted butter, melted and cooled to room temperature
1 cup light brown sugar
½ cup granulated sugar
1 egg
1 egg yolk
2 teaspoons vanilla extract
2 cups chocolate chips
10 ounces caramel candy squares, unwrapped
3 tablespoons heavy cream
Fleur de sel (or other sea salt), for sprinkling over caramel and bars

Directions
1. Preheat oven to 325 degrees F. Grease a 9-inch square pan; set aside.

2. In a medium bowl, whisk together the flour, baking soda, and salt; set aside.

3. Using an electric mixer, mix together the melted butter and sugars on medium speed until combined. Add the egg, egg yolk, and vanilla extract and mix until smooth. Slowly add the dry ingredients and mix on low, just until combined. Stir in the chocolate chips.

4. In a medium microwave-safe bowl, combine the caramels and heavy cream. Microwave on high until the caramels are melted, stirring every 20 seconds. This will take about 2 minutes.

5. Press half of the cookie dough into the prepared pan, smoothing the top with a spatula. Pour the hot caramel over the dough cookie dough and spread into an even layer, leaving some empty space around the edges. Sprinkle the caramel with the sea salt. Drop the remaining cookie dough in spoonfuls over the caramel and gently spread the dough with a spatula until the caramel is covered. Sprinkle the bars with additional sea salt.

6. Bake the cookie bars for 30 minutes, or until the top of the bars are light golden brown and the edges start to pull away from the pan. Completely cool the bars on a wire rack to room temperature, then refrigerate for about 30 minutes to allow the caramel layer to set. Cut into squares and serve. Store leftovers in an airtight container at room temperature.

Saturday, August 25, 2012

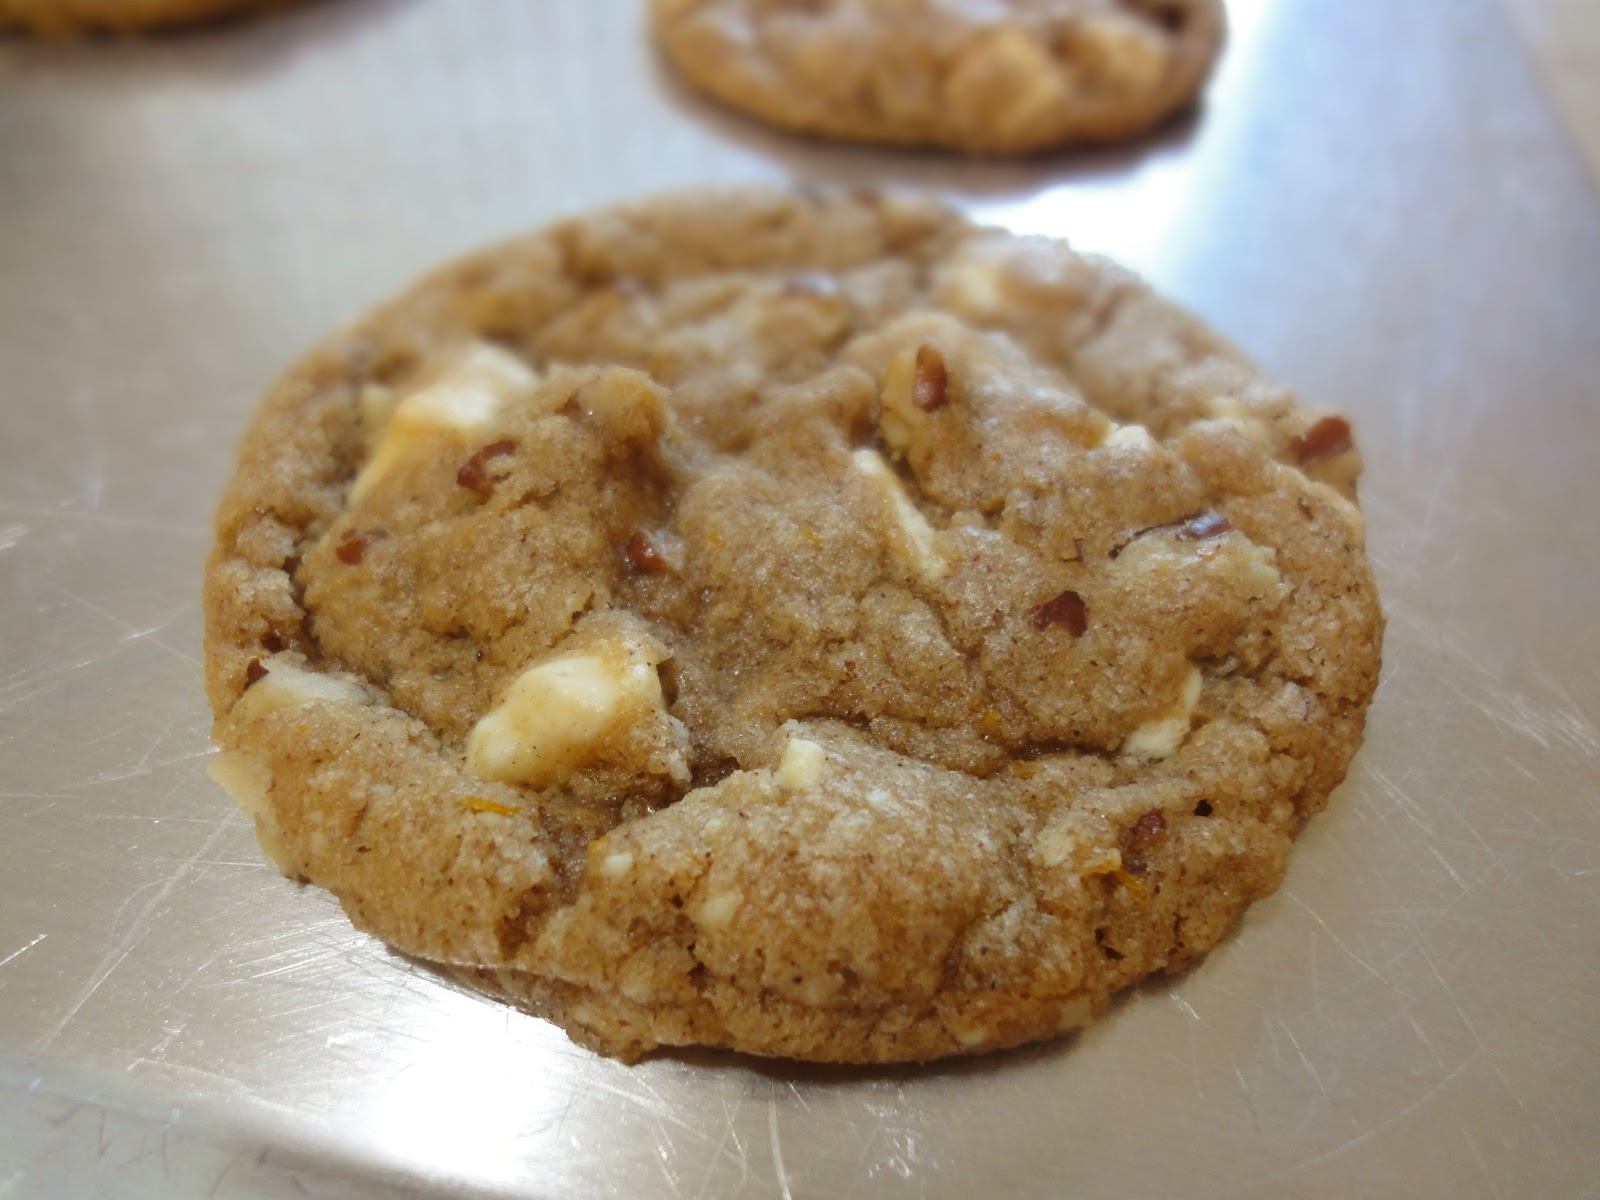
White Chocolate Ginger Cookies


Maryam really wanted these. I told her these are out of season. Wait til autumn! But no. She bought all the ingredients for them. 


I only used one teaspoon of orange zest and 1/4 cup of the crystallized ginger because those are both very strong ingredients.


The cookies came out soft and chewy. They were wonderfully fragrant. On the way to Mizan's, they filled the car with the spiced aroma of cinnamon and ginger.


Monday, August 13, 2012

Vanilla Bean Cupcakes


Just another recipe I wanted to knock out from my pinterest board. 


The recipe comes from My Baking Addiction and of course her cupcakes look just gorgeous. Thankfully though, the cake came out much better this time than those strawberry cupcakes!


They were light and not too sweet or overly flavorful so I hope they were okay for iftar dessert.   


My sister said they look like soft serve ice cream cones.


See those little black flecks? Vanilla beans are scrumptious and smell so good. The cake has one whole bean and the frosting has one whole bean. I can taste a light vanilla flavor, but I have to say it wasn't extremely flavorful. I think because.... 


 I always use vanilla imitation flavoring with no alcohol. I don't use vanilla extract, which I know tastes better, especially if you are making a vanilla cake. So that is probably why the cake wasn't bursting with flavor. But it was still really good, in fact.... 


This white cake would be a really good wedding cake recipe. It had a good crumb texture but didn't fall apart. It was firm and held its shape well. I was scared but behold, it did not taste like pancakes! It was lightly sweet and would pair really well with fruit puree or filling. Use it with strawberry pie filling and whipped cream and you have the perfect strawberry short cake.  


I got 19 cupcakes out this recipe. The only thing I made changes to was the frosting. I used only 2 sticks butter and 3 cups powdered sugar. It was the first time I used clear imitation vanilla extract (McCormick) to keep the frosting white. I tried the frosting before adding it, and disappointing to say, but the vanilla bean didn't taste like much of anything. Then I added 2 teaspoons of the clear vanilla and it gave it all the flavor. I didn't use any cream or milk. Overall, I liked the frosting, but I should mention it tasted just like birthday cake frosting. Still good, but not the gourmet vanilla bean flavor I was hoping for. I guess it would need an extra vanilla bean for a stronger taste.


Blog Installation and Coding by Designs by Linds 2011