Wednesday, December 8, 2021

Eggnog Cheesecake with Chai Spiced Whipped Cream


Eggnog Cheesecake with Chai Spiced Whipped Cream

Crust
2 1/2 cups graham cracker crumbs 
3 tablespoons granulated sugar
1 tsp nutmeg
8 tablespoons butter, melted

Directions
Preheat the oven to 325 degrees F. Grease with butter the bottom and sides of a 9 inch cheesecake pan. Line with parchment paper. 

In a medium bowl, combine the crust ingredients. Press the graham cracker mixture into the bottom and up the sides of the cheesecake pan with a glass measuring cup. Bake the crust for 10 minutes. Set aside to cool.
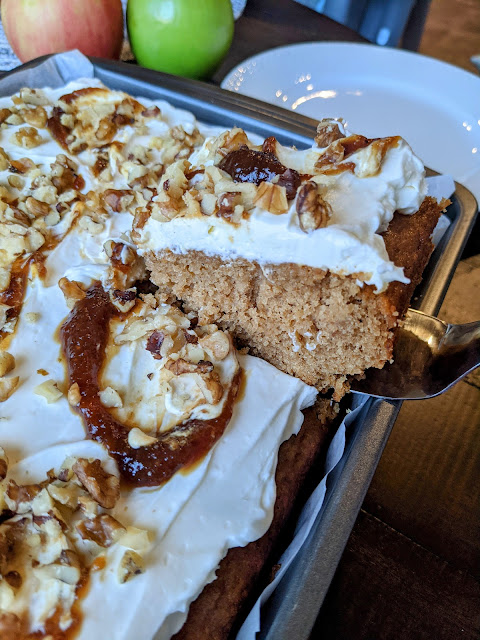
Eggnog Cheesecake
Four 8-ounce packages full fat cream cheese, at room temperature
1 1/3 cups granulated sugar
1 1/2 teaspoon ground nutmeg
3 tablespoons flour
3 large eggs, plus one egg yolk, room temperature
3/4 cup full fat eggnog, I used Southern Comfort Vanilla Spice eggnog *see note
1/4 cup heavy whipping cream
1 tsp rum extract (optional but yes it compliments the eggnog) 

Directions
*Southern Comfort Vanilla Spice eggnog is one of the highest rated eggnogs, and I can taste why! It's like melted vanilla ice cream, and it's a very thick consistency which is good for cheesecake. While I haven't tried it, I read the Southern Comfort "traditional" flavor is not very good so just be sure to use one you like to drink! 

Arrange the two racks inside the oven so that one is at the very bottom and one is in the middle. Preheat the oven to 325 degrees F and coat the inside of a 9″ springform pan with nonstick spray or grease with butter.

Cover the bottom and sides of the pan with parchment paper and set aside. The cheesecake shrinks so this will help prevent cracks as it cools and separates from the pan. 

In a bowl using a hand or stand mixer with the paddle attachment, add the cream cheese and sugar and mix on low speed until smooth and combined. Scrape down the bowl and mix again on low speed to catch any bits at the bottom.

Next, use electric kettle or fill a medium-sized pot with about 4 cups of water and place it over high heat. It should reach a boil by the time the batter is done. Also place a large roast pan on the bottom rack of the oven.

Back to the cheesecake – add the flour and nutmeg and mix on low speed until combined.

Mix in the eggs, one at a time, on low speed. Scrape down the bowl after the first two eggs, and again after the last egg and egg yolk.

Last, measure the eggnog and heavy cream in a measuring cup, mix in the rum extract and stir to combine. Then add this mixture to the cheesecake batter until combined. 

Scrape down the sides and bottom to ensure all of the ingredients are fully incorporated.

Pour the batter into the crust and spread it smooth. It should completely cover the crust.

Now with the boiling water, open the oven door and pull out the bottom rack just enough for you to access the roast pan. Carefully pour the water into the roast pan and push the rack pack in. Quickly place the cheesecake on the middle rack, directly above the roast pan, and close the oven door. This will trap the steam and create a humid baking environment for the cheesecake – preventing it from drying out and cracking.

Bake for 90 minutes. The top of the cake should be golden brown and the center should only be very slightly jiggly. It should be firmer than jello. If its not done yet, lower oven temperature to 300 degrees F and bake for another 10 minutes. I did this and the center came out cooked perfectly. 

When it’s done, turn the oven off and crack open the oven door. Let the cheesecake remain inside the oven for 30 minutes to an 1 hour, until the heat inside the oven is gradually gone.

Remove from oven and allow cheesecake to cool at room temperature for an hour. Then transfer to the refrigerator and let it chill uncovered for at least 4 hours, but preferably overnight. Cover with plastic wrap after its cooled overnight. 

Chai Spiced Whipped Cream
1 cup heavy whipping cream
1/4 cup powdered sugar
1/2 teaspoon cinnamon
1/4 teaspoon nutmeg
1/4 teaspoon ground ginger
1/8 teaspoon ground cloves
1/8 teaspoon cardamom
1/2 teaspoon rum extract
1/2 teaspoon vanilla bean paste (or extract)

Directions
Chill the bowl and whisk attachment in the freezer for five to ten minutes. Place all the ingredients in the chilled bowl of a stand mixer and beat with whisk attachment on high until stiff peaks form. Pipe on top of cheesecake with a star tip. 

Monday, December 6, 2021

White Chocolate Cranberry Oatmeal Cookies


White Chocolate Cranberry Oatmeal Cookies
Adapted from: Sally's Baking Addiction Yield: 26 cookies, using large ice cream scooper

1 cup unsalted butter, softened to room temperature
1 cup packed light or dark brown sugar
1/4 cup granulated sugar
2 large eggs
1 tablespoon pure vanilla extract
1 tablespoon molasses
1 and 1/2 cups all-purpose flour (spooned into measuring cup & leveled)
1 teaspoon baking soda
1/2 teaspoon salt
1 and 1/2 teaspoons ground cinnamon
1/2 teaspoon ground nutmeg
3 cups old-fashioned whole rolled oats (not quick or instant)
1 1/2 cups dried cherries or dried cranberries
1 1/2 cups white chocolate chips

optional for drizzle: one 4-ounce quality white chocolate bar, finely chopped or you could use 3 tablespoons white chocolate chips and a teaspoon of shortening*

Directions
In the bowl of a stand mixer with the whisk attachment, combine the flour, baking soda, salt, cinnamon, and nutmeg together. Transfer to a small bowl and set aside. Then use the original bowl for the stand mixer to allow butter to soften in. 

Using the paddle attachment, cream the softened butter and both sugars together on medium speed until smooth, about 2-3 minutes. Add the eggs and mix on high until combined, about 1 minute. Scrape down the sides and bottom of the bowl as needed. Add the vanilla and molasses and mix on high until combined. Set aside.

Add the flour/spice mixture and mix on low until combined. Beat in the oats, dried fruit, and white chocolate chips on low speed. Dough will be thick, yet very sticky. Chill the dough for 60 minutes in the refrigerator and then use a large ice cream scooper to form balls of dough. If chilling for longer (up to 2 days), allow dough to sit at room temperature for at least 30 minutes before scooping and baking.

Preheat oven to 350°F. Line two large baking sheets with parchment paper or silicone baking mats. Set aside.

Place 2 inches apart on the baking sheets. If the balls of dough have been thoroughly chilled in the fridge, bake for about 16-17 minutes until lightly browned on the sides. The centers will look very soft and under-baked. You will only need to bake about 12-14 minutes if the dough was chilling for about an hour or less. 

Remove from the oven and let cool on baking sheet for 5 minutes before transferring to a wire rack to cool completely. The cookies will continue to “set” on the baking sheet during this time.

Optional White Chocolate Drizzle: You can melt the white chocolate in a double boiler or the microwave. If using the microwave: place the chopped white chocolate or chocolate chips with the shortening in a heat-proof bowl. Melt in 20 second increments in the microwave, stirring after each increment until completely melted and smooth. Drizzle lightly over cookies. Allow the white chocolate to set completely at room temperature for about 30 minutes.

Cover and store leftover cookies (with white chocolate drizzle or without) at room temperature for up to 1 week.

Monday, November 22, 2021

Pumpkin Cheesecake with a Brown Butter Pecan Crust


Pumpkin Cheesecake with a Brown Butter Pecan Crust
Adapted from: Butternut Bakery

Brown Butter Pecan Crust
2 cups graham cracker crumbs 
1/4 cup light brown sugar, packed
1 tsp ground cinnamon
Pinch of salt
3/4 cup unsalted butter
3/4 cup crushed pecans (could use walnuts)

Directions
Preheat the oven to 350 degrees F.

Place the butter in a saucepan over medium heat. Melt and heat until browned. First you will see reddish brown specks form in the butter. Keep your eye on it as it browns quickly after that. Remove from heat and allow to cool. If you see burnt black specks, pour the butter into a glass cup and they will sink to the bottom. Then scoop out the butter from the top to use, you'll need about 6 tablespoons of butter. 

Use food processor to crush pecans until you have about 3/4 cup nuts. Then combine the graham cracker crumbs, nuts, brown sugar, cinnamon, and salt in a bowl. When the brown butter has cooled (it can be warm but not hot), pour into the bowl and stir to coat.

Pour the crumbs into the springform pan and use the bottom of a glass measuring cup to press it into the bottom and sides of the pan.

Bake for 10 minutes on the middle rack, then allow to cool while you make the pumpkin cheesecake batter.

Pumpkin Cheesecake
(4) 8 oz bricks full fat Philadelphia cream cheese, room temp
1 cup light brown sugar, packed
1/2 cup granulated sugar
1 tbsp vanilla bean paste (or vanilla extract)
2 tbsp cornstarch (I used 3 tablespoons flour)
1/4 tsp salt
I used 3 tablespoons pumpkin pie spice or you could use: 
1 1/2 tsp ground cinnamon
1/2 tsp ground ginger
1/4 tsp ground nutmeg
1/4 tsp allspice

1/4 cup full fat sour cream
4 large eggs, room temp
15 oz can pumpkin puree (not pumpkin pie filling)

Directions
Arrange the two racks inside the oven so that one is at the very bottom and one is in the middle. Preheat the oven to 350 degrees F and coat the inside of a 9″ springform pan with nonstick spray or grease with butter.

Cover the bottom and sides of the pan with parchment paper and set aside. The cheesecake shrinks so this will help prevent cracks as it cools and separates from the pan.

In a bowl using a hand or stand mixer with the paddle attachment, add the cream cheese and sugar and mix on low speed until smooth and combined. Scrape down the bowl and mix again on low speed to catch any bits at the bottom.

Next, use electric kettle or fill a medium-sized pot with about 4 cups of water and place it over high heat. It should reach a boil by the time the batter is done. Also place a large roast pan on the bottom rack of the oven. Preheat oven to 350 degrees F.

Back to the cheesecake – add the vanilla, cornstarch/flour, salt, and spices and mix on low speed until combined.

Scrape down the bowl and mix in the sour cream, again on low speed.

Mix in the eggs, one at a time, on low speed. Scrape down the bowl after the first two eggs, and again after the last two eggs.

Last, mix in the entire can of pumpkin puree on low speed. When it appears to be fully mixed in, remove the bowl from the mixer and mix the batter by hand.

Scrape down the sides and bottom to ensure all of the ingredients are fully incorporated.

Pour the batter into the crust and spread it smooth. It should completely cover the crust.

Now with the boiling water, open the oven door and pull out the bottom rack just enough for you to access the roast pan. Carefully pour the water into the roast pan and push the rack pack in. Quickly place the cheesecake on the middle rack, directly above the roast pan, and close the oven door. This will trap the steam and create a humid baking environment for the cheesecake – preventing it from drying out and cracking.

Bake for 70-85 minutes. It should look very puffed on the outside with a slightly jiggly center. The center should be firmer/sturdier than jello. I baked it about 85 minutes. 

When it’s done, turn the oven off and crack open the oven door. Let the cheesecake remain inside the oven for 30 minutes to an 1 hour, until the heat inside the oven is gradually gone.

Remove from oven and allow cheesecake to cool at room temperature for an hour. Then transfer to the refrigerator and let it chill uncovered for at least 4 hours, but preferably overnight. Cover with plastic wrap after its cooled overnight. 

Saturday, November 20, 2021

Mini Apple Hand Pies


Mini Apple Hand Pies
Adapted from: Butternut Bakery

Pie filling
1 box store bought pie dough, containing 2 sheets
2 tbsp unsalted butter
2 1/2 cups finely chopped granny smith, fuji or honeycrisp apples (about 2 large apples)*see note
1/4 cup light brown sugar, packed
1 tsp ground cinnamon
Juice of 1/2 lemon
1/2 tsp cornstarch, mixed with 1 tbsp water

Cinnamon Sugar
1 large egg
1/2 cup granulated sugar
1 tsp ground cinnamon

Directions
*Be sure to use really good, flavorful apples. I would do one green apple and one red apple or any good organic apple. The majority of the flavor for these pies comes from the apple. You don't really need the juices, just fill with plenty of apples.

Remove the pie dough from the refrigerator and allow the sheets to come to room temp while you make the filling.

In a saucepan over medium heat, melt down the butter. Once melted, mix in the apples, brown sugar, cinnamon, and lemon juice. Heat for about 10 minutes, or until the apples are just tender. Try not to overcook, keep close to 10 minutes. 

Mix together the cornstarch and water in a small dish and pour into the pot with the apples. Stir and heat for about 30 seconds. It will thicken just slightly, it won't be swimming in juices. Remove from heat and allow the filling to cool while we prep the pie dough.

Preheat the oven to 400 degrees F and line a large baking sheet with parchment paper.

Lightly dust your surface with flour and unroll one of the pie sheets. Use a rolling pin to gently smooth the surface, just enough to smooth out any wrinkles and ridges. 

Using an apple-shaped cookie cutter or a glass cup (mine was 3.5 inches in diameter), cut out your apples in the pie dough. Roll out the scraps to cut out a few more apples. You should be able to get about 8-10 apples per sheet.

Transfer these apples to the refrigerator while you cut out the other sheet.
 
Now place half of the apples on the baking sheet, spaced evenly apart. If you can’t fit all apples, leave the excess in the refrigerator and bake after the first batch is done. 

Fill the center of each apple with a tablespoon of the filling, leaving a small border around the edge.

Beat the egg with about 2 teaspoons of water. Brush the bare border of each filled apple with the egg wash.

To the other half of the apples, cut 4 slits in the center as shown in the photos.

Place the vented apples on top of the filled apples and gently press down on the seems to seal the pies shut. Then crimp the edges with a fork and brush the surface of each apple with plenty of egg wash.

In a small dish, mix together the cinnamon and sugar. Sprinkle about 1 teaspoon of the cinnamon sugar on top of each apple.

Bake for 20 minutes. Allow the apples to cool on the baking sheet for about 5 minutes, then transfer to a cooling rack. 

Thursday, November 11, 2021

Mini Pumpkin Hand Pies


 Mini Pumpkin Hand Pies
Adapted from: Butternut Bakery

Pie filling
1 box store bought pie dough, containing 2 sheets 
4 oz cream cheese, room temp
1/2 cup light brown sugar, packed
1/2 cup pumpkin puree
1/2 tsp pumpkin pie spice
Pinch of salt

Cinnamon Sugar
1 large egg
1/2 cup granulated sugar
1 tsp ground cinnamon

Directions
Remove the pie dough from the refrigerator and allow the sheets to come to room temp while you make the filling.

In a bowl using a fork, mash and mix together the cream cheese and brown sugar.

Once smooth, mix in half of the pumpkin puree. Once combined, mix in the other half along with the pumpkin pie spice and salt.

Preheat the oven to 400 degrees F and line a large baking sheet with parchment paper.

Lightly dust your surface with flour and unroll one of the pie sheets. Use a rolling pin to gently smooth the surface, just enough to smooth out any wrinkles and ridges. 

Use a pumpkin-shaped cookie cutter or a homemade pumpkin template. I made mine out of the box the pie dough came in by tracing a pumpkin that is 4.5 inches wide and 3.5 inches tall on the cardboard and cutting it out. Cut out your pumpkins from the pie dough. Roll out the scraps to cut out a few more pumpkins. I got about 8 pumpkins per sheet.

Transfer these pumpkins to the refrigerator while you cut out the other sheet. 
Now place half of the pumpkins on the baking sheet, spaced evenly apart. If you can’t fit all 10 pumpkins, leave the excess in the refrigerator and bake after the first batch is done. 

Fill the center of each pumpkin with a tablespoon of the filling, leaving a small border around the edge.

Beat the egg with about 2 teaspoons of water. Brush the bare border of each filled pumpkin with the egg wash.

To the other half of the pumpkins, cut 4 slits to resemble the ridges of a real pumpkin. I like to think of it as two sets of parentheses, a larger one going on the outside with a narrow set on the inside. 

Place the vented pumpkins on top of the filled pumpkins and gently press down on the seems to seal the pies shut. Then crimp the edges with a fork and brush the surface of each pumpkin with plenty of egg wash.

In a small dish, mix together the cinnamon and sugar. Sprinkle about 2 teaspoon of the cinnamon sugar on top of each pumpkin.

Bake for 20 minutes. Allow the pumpkins to cool on the baking sheet for about 5 minutes, then transfer to a cooling rack. 

Monday, November 8, 2021

Apple Butter Spice Cake with Whipped Cream Cheese Frosting


Apple Butter Spice Cake with Whipped Cream Cheese Frosting
Recipe by: Butternut Bakery

Apple Butter Spice Cake
2 3/4 cups (330g) all purpose flour
1 1/2 tsp baking powder
1/2 tsp baking soda
1/2 tsp salt
2 tsp ground cinnamon
1 tsp ground ginger
1/2 tsp ground cardamom
1/4 tsp ground nutmeg
1/8 tsp ground clove
1 cup (225g) vegetable oil, or any mild baking oil
1 cup (200g) light brown sugar, packed
1/2 cup (100g) granulated sugar
1 tbsp vanilla extract
3 large eggs
1 cup (295g) apple butter
1 cup grated Granny Smith apples (about 2 apples)
1/2 cup (120ml) milk

Directions
Preheat oven to 350 degrees F. Grease a 9×13 baking pan. Line with parchment paper and set aside.

Whisk together the flour, salt, baking soda, baking powder, and spices in a medium bowl and set aside.

In a large mixing bowl, whisk together the oil, sugars, vanilla, eggs, and apple butter. Mix in the grated apples.

Whisk in half of the dry ingredients. Just before combined, whisk in the milk. Then whisk in the rest of the dry ingredients. 

Pour the batter into the baking pan and spread even. Bake for 35-40 minutes, or until a toothpick in the center comes out clean with a few moist crumbs.

Allow the cake to cool completely before frosting.

Whipped Cream Cheese Frosting
8 oz full fat cream cheese, chilled
1/2 cup (100g) granulated sugar
1 cup (240ml) heavy whipping cream
1/3 cup apple butter
Chopped walnuts

Directions
Add the chilled cream cheese and sugar to the bowl of a stand mixer with the whisk attachment.
Whip the cream cheese on high speed until smooth.

With the mixer on medium-high speed, slowly pour in the heavy cream. Continue to whip on high speed for about 3 minutes, or until the frosting is light and fluffy.

Spread the frosting on the cooled cake and top with a few generous spoonfuls of apple butter. Gently swirl into the frosting and top with a sprinkle of walnuts.

Saturday, July 28, 2018

Matcha Green Tea Cake with Matcha Buttercream and White Chocolate Drip


Matcha Green Tea Cake with Matcha Buttercream and White Chocolate Drip
Adapted from: Pepper Delight

Matcha Green Tea Cake
1 ¾ cup flour
1 ½ tsp baking powder
¼ tsp salt
2 tsp matcha powder
½ cup + 3 tbsp unsalted butter (softened at room temperature)
1 ½ cup granulated sugar
2 large eggs (at room temperature)
1 tsp vanilla extract
⅔ cup milk (at room temperature)

Directions
Preheat oven to 350 degrees F.

Line three 6-inch pans with parchment paper, apply butter to the pan and set aside.

In a medium bowl, combine dry ingredients by sifting flour, baking powder salt and matcha powder. Set aside.

In the bowl of a stand mixer fitted with a paddle attachment, beat butter until smooth and creamy. Add the granulated sugar and beat until combined.

Beat in the eggs one at a time, followed by adding vanilla extract.

Add the dry ingredients alternating with milk and beat until they combine well. The cake batter will be dense, but that’s normal.

Pour into the prepared pans and bake for 27 mins until a toothpick or a skewer inserted in the center comes out clean. Do not use wet insulated strips around the pans. I tried it, and it was better without. Flip the cake pans over carefully and allow cakes to cool completely.

Matcha Green Tea Buttercream
2 cups butter, softened
5 cups powdered sugar
1 teaspoon clear vanilla (optional)
3 teaspoons Matcha powder


Directions
In the bowl of an electric mixer fitted with the paddle attachment, beat the butter for 4 minutes on medium speed (I use speed "4" on my KitchenAid).  Add remaining ingredients and mix on low speed for 1 minute, then on medium speed for 5 minutes.

Assemble the cake on a cake board and frost between each layer and outside of cake. After frosted, refrigerate the cake for 30 minutes if you are going to do the white chocolate drip. 

White Chocolate Drip
1 cup white chocolate chips
1 tsp Crisco shortening

Directions
After chilling the cake for about 30 minutes, melt the white chocolate and shortening in the microwave on 50% heat for 1 minute. Stir and continue to melt in 10 second intervals, stirring after each time to be sure it melts evenly. Melting chocolate in the microwave can easily overheat and then no longer be smooth and fluid. 

Place the cake on a turn table.

Pour melted chocolate into a ziplock plastic bag and when ready to use, snip the corner of the bag to drizzle over cake. Start near the edges, making the drips along the sides as you turn the cake.  Then drizzle over the center of the cake. Spread evenly with knife if needed. 

Allow to set for 5-10 minutes before frosting swirls and decorating the top. Or immediately use sprinkles while the drip is wet so that it sticks to the cake. 

Monday, June 29, 2015

Vanilla Bean Flan Cake


Vanilla Bean Flan Cake 
Adapted from: Mel's Kitchen Cafe

Vanilla Bean Cake
1/2 cup caramel sauce or topping (store bought or homemade)
1 box white or vanilla cake mix
1/2 tablespoon vanilla bean extract

Directions
Preheat the oven to 350 degrees F. Grease a 12-cup bundt pan, taking care to get in all the nooks and crannies. Pour the caramel sauce into the bottom of the pan (the caramel sauce, if store-bought and thick, may need a quick warm-up in the microwave to be pourable).

In a medium bowl, make the boxed cake mix according to the instructions and then mix in the extract. 

Do not pour the entire batch of batter into the bundt pan. It will be too much. Pour about a third of it into the pan, evenly over the caramel. Refrigerate the rest of the cake batter to bake later.

Flan
2 (14-ounce) cans sweetened condensed milk (when split: 1 can)*
2 1/2 cups whole milk (when split: 1 1/4 cups)
6 ounces cream cheese (when split: 3 ounces)
6 large eggs (when split: 3 whole eggs)
4 large egg yolks (when split: 2 egg yolks)
1 teaspoon vanilla bean extract (when split: 1/2 teaspoon)

Directions
*The original recipe says to add all the flan ingredients to a blender and process until smooth. I have a standard size (even a tad bit on the large size) blender and I have to process it in two batches because its too much. So split the above recipe in half, process in the blender, and then repeat.  

Slowly and carefully pour the flan mixture over the the cake batter. Place the cake pan in a large roasting pan. Place the roasting pan in the oven and carefully pour warm water into the roasting pan until it reaches halfway up the sides of the bundt pan. Bake the cake until a toothpick comes out clean in both the cake and flan (or the flan registers 180 degrees on an instant-read thermometer), about 75 minutes.

Remove the Bundt pan from the roasting pan (the easiest way for cleanup is to leave the roasting pan and water in the oven until it has cooled) and place it on a wire rack to cool completely. Refrigerate for 8 hours  or overnight.

To remove the cake from the pan, fill a large bowl with hot water and place the bottom third of the Bundt pan in the water for 1 minute. Carefully invert the cake onto a flat plate or cake platter - I do this by putting the cake platter or plate over the Bundt pan opening and then, holding onto the edges of both platter and cake pan, I gently turn the pan upside down while flipping the cake platter. Slowly remove the pan letting the caramel drizzle over the top of the cake. Serve chilled.

Thursday, June 25, 2015

Pecan Pie Chocolate Truffles


Toasted pecans, brown sugar, caramel, AND milk chocolate! I added a swirl of dulce de leche to the center of these Pecan Pie Truffles. Nutty, gooey, salty and sweet!


Pecan Pie Chocolate Truffles
Adapted from: High Heels & Grills
Yield: 2 dozen truffles


Oat and Walnut Crust
2 1/2 cups pecans
1 cup graham cracker crumbs
1 cup light brown sugar, packed
1/2 tsp. salt
2 Tbsp. maple syrup
3/8 cup corn syrup
1 1/2 tsp. vanilla
Dulce De Leche, refrigerated jar, optional

12-16 oz. dipping chocolate {chocolate bark or Wilton cocoa candy melts}

Directions
Preheat the oven to 350ยบ F. If your pecans are not toasted it, place them whole on a baking sheet (don't use a dark one). Lie them flat in one layer on the pan and bake for only 6-7 minutes. Do not leave the oven. The oils in the nuts heat up fast and they can burn very quickly. As soon as you smell them, take them out of the oven immediately. Allow to cool and then process in a blender until fine. Reserve 1/4 cup to sprinkle on top of the truffles at the end.

In a medium bowl, combine together the pecans, graham cracker crumbs, brown sugar and salt.
Add maple syrup, corn syrup and vanilla and mix thoroughly. Refrigerate mixture for 15 minutes.

Line a cookie sheet with wax paper. Roll mixture into 1 inch balls and place on wax paper; let truffles refrigerate for 30 minutes. Optional, add a 1/4 tsp of dulce de leche to the center before rolling into a ball.

Melt the dipping chocolate according to package directions. Coat the truffles with chocolate and return back to wax paper. Sprinkle some reserved pecans on top of the truffles before the chocolate hardens. Once chocolate hardens, serve and enjoy.
 
Blog Installation and Coding by Designs by Linds 2011